Zucchini Parsley Fritters with Cashew Aioli

Try this number for your next meatless Monday. A flavorful mouthful of zucchini and carrot topped with the creamy punch of cashew lemon and avocado.

IMG_7396

Recipe adapted from Wholehearted Eats

2 Small Zucchinis, about 2 Cups
1 Carrot, Grated
1 Green Onion, Sliced
1/2 Cup Rolled Oats (or quinoa, or even buckwheat), ground in a Vitamix to make flour
2 Tbsp. Black Sesame Seeds
1 Rounded Tbsp. Chopped Parsley
1/4 tsp. Sea Salt
1/8 tsp. Ground Cumin
1/8 tsp. Ground Pepper

1. Begin by grating the zucchinis. Sprinkle them with a little salt and let them drain in a colander for about 20 minutes.
2. In a bowl combine the carrot, onion, dill, sesame seeds, oat flour, and spices.
3. Squeeze the zucchini to remove extra water and add to the mix. Combine thoroughly.
4. Heat a pan to medium heat and add a splash of coconut or avocado oil. Take about 2 Tbsp. of mix and flatten in your palms making a thin pancake shape. Cook them for about 1-2 minutes per side, or until crisp and golden, adding more oil as needed.

Cashew Aioli

1/2 Cup Cashews
1/4 Cup Water
1/4 Cup of Lemon Juice
1/2 tsp. Apple Cider Vinegar
the Zest of one Lemon
1/8 tsp Sea Salt

1. Soak the cashews overnight in fresh water. The next day, drain them and combine alongside the other ingredients (alternatively, you can use 1/2 cup prepared cashew cream). Puree until smooth. You may need to adjust for more water and seasoning. Keeps in the refrigerator for about 5 days.

Funfetti First Birthday Cake

If there is one thing I didn’t have enough of during my childhood it was funfetti cake. Cookie and ice cream cakes dominated 90’s parties. That’s why for my nieces first birthday I made her a funfetti cake that she’ll never forget. But really probably won’t ever remember. Oh well.

IMG_6872

IMG_6869

Recipe from Food52

CAKE

  • 1cup (2 sticks) unsalted butter, at room temperature
  • 1 1/2cups sugar
  • 4large egg whites
  • 2tablespoons clear imitation vanilla (I use McCormick’s –see headnote)
  • 6tablespoons vegetable oil
  • 2 1/2cups cake flour (see headnote)
  • 2 1/4teaspoons baking powder
  • 3/4teaspoon salt
  • 1cup whole milk
  • 2/3 cup plus 1 tablespoon sprinkles (see headnote)

FROSTING

  • 2cups (or 4 sticks) unsalted butter, at room temperature
  • 3cups powdered sugar, or to taste
  • 2teaspoons clear imitation vanilla
  • 1pinch salt
  1. Preheat oven to 350° F. Grease two 8-inch cake pans. Cut out circles of parchment paper and line the bottom of the pans. Lightly spray the parchment.
  2. With an electric mixer or in the bowl of a stand mixer, cream together the butter and sugar until fluffy. Add the egg whites, one at a time, mixing well after each one. Mix in the vanilla and oil.
  3. In a medium bowl, whisk together the flour, baking powder, and salt. With your mixer running on low, add this to the butter mixture in three additions, alternating with the milk. Once you have a smooth batter, fold in the 2/3 cup of sprinkles.
  4. Divide the batter evenly between the pans. Sprinkle the remaining tablespoon of sprinkles over the top and bake the cakes until a toothpick inserted into the center comes out clean. Begin checking for doneness at around 25 minutes.
  5. Let the cakes cool for a few minutes in the pans and then flip them onto a cooling rack to cool completely before frosting.
  6. To make the colorful bunting, knead food coloring (liquid or gel) into marzipan, cut out triangles, and stick them onto the cake.

Chocolate Chip Cookie Overload

Something was brewing in me. I’d been getting the urge to bake and nothing inspires me more than STRESS. And launching a website for your client will do that to you. Here is the after math:

Chocolate Malted Cookies

IMG_7022

Recipe c/o A Cozy Kitchen

1 1/2 cups all-purpose flour
3/4 cup milk powder
1/2 teaspoon baking soda
3/4 teaspoons fine-grain sea salt
2 sticks (8 ounces) unsalted butter, room temperature
1 1/2 cups light or dark brown sugar
2 large eggs, room temperature
3/4 cup semi-sweet chocolates
1 cup rice krispies

1. Preheat the oven to 350 degrees F.

2. In a medium bowl, whisk together the all-purpose flour, malt powder, baking soda and salt.

3. In a large bowl, cream together the butter and brown sugar until light and fluffy, about 2 to 3 minutes. Add the first egg and beat until combined; add the second egg and beat one more time until incorporated. In two batches, add the flour mixture, mixing just until there are no specks of flour. Fold in the chocolate chips and then fold in the puffed rice.

4. Using a 2-inch cookie dough scooper, drop rounds of cookie dough onto a parchment-lined baking sheet, spacing the cookies about 2-inches apart. Transfer the baking sheet to the oven and bake for 8-10 minutes, until the cookies’ edges are lightly golden brown and the centers are very soft. Warning: they’ll be very fragile so be sure to let them cool on the baking sheet. Carefully transfer the cookies to a cooling rack until room temperature. As they cool they’ll have more structure, chewiness and less fragility.

For the dark chocolate chip cookies I used a Tollhouse cookie recipe which I don’t think is right for dark chocolate. Still searching for my favorite Dark Chocolate cookie recipe (other than Jaques Torres version).

  • 2 1/4 cups all-purpose flour
  • 1 teaspoon baking soda
  • 1 teaspoon salt
  • 1 cup (2 sticks) butter, softened
  • 3/4 cup granulated sugar
  • 3/4 cup packed brown sugar
  • 1 teaspoon vanilla extract
  • 2 large eggs
  • 1 2/3 cups (10-oz. pkg.) Dark Chocolate Chips

PREHEAT oven to 375° F.
COMBINE flour, baking soda and salt in small bowl. Beat butter, granulated sugar, brown sugar and vanilla extract in large mixer bowl until creamy. Add eggs, one at a time, beating well after each addition. Gradually beat in flour mixture. Stir in morsels and nuts. Drop by rounded tablespoon onto ungreased baking sheets.
BAKE for 9 to 11 minutes or until golden brown. Cool on baking sheets for 2 minutes; remove to wire racks to cool completely.

Triple-Chocolate Mousse Cake

Thanksgiving is for show stoppers. Generally the show stopper is the big bird on the table but this year I wanted to put a lot of effort into crafting my dessert. When I came across this elegant number on America’s Test Kitchen I knew it was the one.

The layers effortlessly build on each other to create a fantastical chocolate splendor.

Triple-Chocolate Mousse Cake

Triple-Chocolate Mousse Cake

IMG_6319

3 slices for me

Look at those layers

Bottom Layer

  • 6tablespoons (3/4 stick) unsalted butter, cut into 6 pieces, plus extra for greasing pan
  • 7ounces bittersweet chocolate, chopped fine (see note)
  • 3/4teaspoon instant espresso powder
  • 1 1/2teaspoons vanilla extract
  • 4large eggs, separated
  • pinch table salt
  • 1/3cup packed (about 2 1/2 ounces) light brown sugar, crumbled with fingers to remove lumps

Middle Layer

  • 2tablespoons cocoa powder, preferably Dutch-processed
  • 5tablespoons hot water
  • 7ounces bittersweet chocolate, chopped fine (see note)
  • 1 1/2cups cold heavy cream
  • 1tablespoon granulated sugar
  • 1/8teaspoon table salt

Top Layer

  • 3/4teaspoon powdered gelatin
  • 1tablespoon water
  • 6ounces white chocolate chips (see note)
  • 1 1/2cups cold heavy cream
  • Shaved chocolate or cocoa powder for serving, optional (see note)

1. FOR THE BOTTOM LAYER: Adjust oven rack to middle position and heat oven to 325 degrees. Butter bottom and sides of 91/2-inch springform pan. Melt butter, chocolate, and espresso powder in large heatproof bowl set over saucepan filled with 1 inch of barely simmering water, stirring occasionally until smooth. Remove from heat and cool mixture slightly, about 5 minutes. Whisk in vanilla and egg yolks; set aside.

2. In stand mixer fitted with whisk attachment, beat egg whites and salt at medium speed until frothy, about 30 seconds. Add half of brown sugar and beat until combined, about 15 seconds. Add remaining brown sugar and beat at high speed until soft peaks form when whisk is lifted, about 1 minute longer, scraping down sides halfway through. Using whisk, fold one-third of beaten egg whites into chocolate mixture to lighten. Using rubber spatula, fold in remaining egg whites until no white streaks remain. Carefully transfer batter to prepared springform pan, gently smoothing top with offset spatula.

3. Bake until cake has risen, is firm around edges, and center has just set but is still soft (center of cake will spring back after pressing gently with finger), 13 to 18 minutes. Transfer cake to wire rack to cool completely, about 1 hour. (Cake will collapse as it cools.) Do not remove cake from pan.

4. FOR THE MIDDLE LAYER: Combine cocoa powder and hot water in small bowl; set aside. Melt chocolate in large heatproof bowl set over saucepan filled with 1 inch of barely simmering water, stirring occasionally until smooth. Remove from heat and cool slightly, 2 to 5 minutes.

5. In clean bowl of stand mixer fitted with whisk attachment, whip cream, granulated sugar, and salt at medium speed until mixture begins to thicken, about 30 seconds. Increase speed to high and whip until soft peaks form when whisk is lifted, 15 to 60 seconds.

6. Whisk cocoa powder mixture into melted chocolate until smooth. Using whisk, fold one-third of whipped cream into chocolate mixture to lighten. Using rubber spatula, fold in remaining whipped cream until no white streaks remain. Spoon mousse into springform pan over cooled cake and gently tap pan on counter 3 times to remove any large air bubbles; gently smooth top with offset spatula. Wipe inside edge of pan with damp cloth to remove any drips. Refrigerate cake at least 15 minutes while preparing top layer.

7. FOR THE TOP LAYER: In small bowl, sprinkle gelatin over water; let stand at least 5 minutes. Place white chocolate in medium bowl. Bring ½ cup cream to simmer in small saucepan over medium-high heat. Remove from heat; add gelatin mixture and stir until fully dissolved. Pour cream mixture over white chocolate and whisk until chocolate is melted and mixture is smooth, about 30 seconds. Cool to room temperature, stirring occasionally, 5 to 8 minutes (mixture will thicken slightly).

8. In clean bowl of stand mixer fitted with whisk attachment, whip remaining cup cream at medium speed until it begins to thicken, about 30 seconds. Increase speed to high and whip until soft peaks form when whisk is lifted, 15 to 60 seconds. Using whisk, fold one-third of whipped cream into white chocolate mixture to lighten. Using rubber spatula, fold remaining whipped cream into white chocolate mixture until no white streaks remain. Spoon white chocolate mousse into pan over middle layer. Smooth top with offset spatula. Return cake to refrigerator and chill until set, at least 2½ hours.

9. TO SERVE: If using, garnish top of cake with chocolate curls or dust with cocoa. Run thin knife between cake and side of springform pan; remove side of pan. Run cleaned knife along outside of cake to smooth sides. Cut into slices and serve.


Focaccia with Roasted Squash

Thanksgiving is always a conflict for me on the food front. I want to keep things traditional but yet I want to try new recipes and start new traditions. Last year I was dead set on lamb roast instead of turkey which was a good call. This year my bro-in-law suggested capon to replace the turkey. Capon is just a glorified chicken so yeah, it tasted like a great roast chicken. Appetizers is kind of an area that’s free range on Thanksgiving so I decided to make Foccacia with Roasted Squash inspired by the feature in Food and Wine magazine last month. However when it comes to baking bread I often visit America’s Test Kitchen for a bit more education therefore the recipe below is a hodgepodge of the two.

The process of making focaccia is a bit more arduous then I remember but oh boy does it deliver. Light and airy with tons of flavor and moisture. You could put just about anything on top of focaccia and it would be great.

Stay tuned for my dessert masterpiece.

Focaccia with Roasted Squash

Focaccia with Roasted Squash

Sliced up ready to eat!

Sliced up ready to eat!

Biga

  • 1/2cup (2 1/2 ounces) unbleached all-purpose flour
  • 1/3cup (2 2/3 ounces) warm water (100-110 degrees F)
  • 1/4teaspoon instant or rapid-rise yeast

Dough

Topping

  • Butternut squash
  • Olive oil
  • Thyme
  • Salt

1. FOR THE BIGA: Combine flour, water, and yeast in large bowl and stir with wooden spoon until uniform mass forms and no dry flour remains, about 1 minute. Cover bowl tightly with plastic wrap and let stand at room temperature (about 70 degrees) overnight (at least 8 hours and up to 24 hours.) Use immediately or store in refrigerator for up to 3 days (allow to stand at room temperature 30 minutes before proceeding with recipe.)

2. FOR THE DOUGH: Stir flour, water, and yeast into biga with wooden spoon until uniform mass forms and no dry flour remains, about 1 minute. Cover with plastic wrap and let rise at room temperature for 15 minutes.

3. Sprinkle 2 teaspoons salt over dough; stir into dough until thoroughly incorporated, about 1 minute. Cover with plastic wrap and let rise at room temperature 30 minutes. Spray rubber spatula or bowl scraper with nonstick cooking spray; fold partially risen dough over itself by gently lifting and folding edge of dough toward middle. Turn bowl 90 degrees; fold again. Turn bowl and fold dough 6 more times (total of 8 turns). Cover with plastic wrap and let rise for 30 minutes. Repeat folding, turning, and rising 2 more times, for total of three 30-minute rises. Meanwhile, adjust oven rack to upper-middle position, place baking stone on rack, and heat oven to 500 degrees at least 30 minutes before baking.

4. Gently transfer dough to lightly floured counter. Lightly dust top of dough with flour and divide in half. Shape each piece of dough into 5-inch round by gently tucking under edges. Coat two 9-inch round cake pans with 2 tablespoons olive oil each. Sprinkle each pan with ½ teaspoon kosher salt. Place round of dough in pan, top side down; slide dough around pan to coat bottom and sides, then flip over. Repeat with second piece of dough. Cover pans with plastic wrap and let rest for 5 minutes.

5. Using fingertips, press dough out toward edges of pan. (If dough resists stretching, let it relax for 5 to 10 minutes before trying again.) Using dinner fork, poke surface of dough 25 to 30 times, popping any large bubbles. Spread squash evenly over top and push into dough.Let dough rest until slightly bubbly, 5 to 10 minutes.

6. PREPARE THE TOPPING Preheat the oven to 400°. In a large bowl, toss the squash with the 2 tablespoons of olive oil and season with salt and pepper. Spread the slices in a single layer on 2 large rimmed baking sheets and roast for about 15 minutes, until tender; let cool completely. Increase the oven temperature to 450°.

7. Gently curl the cooled squash slices and press them into the dough. Brush the focaccia with olive oil and bake for 25 to 30 minutes, until risen and browned on top. Transfer to a rack and let cool for 5 minutes.

Soft Pillowy Pumpkin Sandwich Cookies

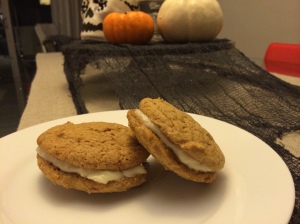
Here comes another seasonal recipe – Pumpkin Sandwich Cookies with a Cream Cheese Filling. I shared these with friends in a plain white box decorated with washi tape (my new obsession). What I love about these cookies is their texture is more that of a cake than a cookie.

IMG_5774.JPG

Pumpkin Sandwich Cookies

IMG_5814.JPG

Washi Tape on White Box


Recipe from A Cozy Kitchen

Cookies:
2 1/2 cups all-purpose flour
1 teaspoon baking powder
1 teaspoon baking soda
1/2 teaspoon ground cardamon
1 1/2 teaspoons ground cinnamon
1/4 teaspoon ground nutmeg
1/2 teaspoon salt
1 cups granulated white sugar
1/2 cup brown sugar
1/2 cup butter (1 stick), softened
1 large egg
1 teaspoon vanilla extract
1 cup of pure pumpkin puree (canned or homemade)
2 tablespoons of pumpkin seeds (optional)

Cream Cheese Frosting:

1/4 cups butter, softened
4 ounces, cream cheese, softened
1 cups sifted powdered sugar
1/2 teaspoon vanilla extract

For the cookies:
Preheat oven to 350F. Line a baking sheet with a silpat or parchment.

In a medium bowl, combine the flour, baking powder, baking soda, cardamon, cinnamon, nutmeg and salt. Mix and set aside.

In another medium bowl, beat the granulated sugar, brown sugar and softened butter until combined and blended. Add the egg, vanilla extract, pumpkin and beat until smooth.

Grab a spatula or wooden spoon, and in two batches, gradually mix in flour mixture, until thoroughly combined.

Using a stainless-steel ice cream scoop (with one of those hand releases), drop the cookie dough onto the parchment lined baking sheet, being sure to leave room for the dough to spread. If you don’t have an ice cream scooper, you could also drop the dough using two teaspoons.

Sprinkle 3 or 4 pumpkin seeds on the top of the cookies for decoration. I tried to put them in a trio just for appearance purposes. (This is totally optional.)

Bake for 15 minutes, or until the edges of the cookies are lightly golden brown. They should still be soft to the touch. Carefully transfer to a rack to cool completely.

For the icing:

In a medium bowl, beat the butter and cream cheese until smooth and creamy. Add the powdered sugar and vanilla. Beat until completely smooth.

Assembly:

Flip half of the cookies upside down. Using a butter knife, dollop one teaspoon of the icing in the center of each upside down cookie. Smooth it around with your knife until the icing just reaches the edges. Top with another cookie and gently press the two cookies together.

Cookies should be stores in an airtight container and will be moist and delicious for up to 2 days.

Yields about 12 sandwich cookies

Buttermilk Apple Cake

This was a splendid recipe that came out very moist (thank you buttermilk) and was a great compliment to a morning coffee. It’s got a nice presentation too.

IMG_6132.JPG

Buttermilk Apple Cake


12 tablespoons unsalted butter, room temperature

1 1/2 cup sugar, plus 4 tablespoons for topping

2 egg, room temperature

2 teaspoon vanilla extract

3 cups all-purpose flour

4 teaspoons baking powder

1/2 teaspoon sea salt

1/2 teaspoon freshly grated nutmeg, plus more for topping

1 cup buttermilk

grated zest of 2 large lemons

grated zest of 1 large orange

2 large gala apples, peeled, cored, and cut into 1/2-inch thick slices

Preheat the oven to 350 degrees F. Liberally grease or spray two 9-inch cake pans.

Using a stand mixer fitted with the paddle attachment or hand held beaters, beat the butter on medium speed until light and airy. Add sugar, and continue beating until everything is pale and fluffy. Stop mixer as needed to scrape down the sides. Switch mixer back on, and add the egg, followed by the vanilla.

Meanwhile, in a medium bowl, combine the flour, baking powder, sea salt, and nutmeg.

Switch mixer to low and add half the flour mixture, followed by all of the buttermilk and then the second half of the flour mixture. Add the zest and mix on low just until combined.

Spoon batter into prepared pan. Arrange the apple slices in a circle along the outer edge of the pan, so that the slices are set straight down onto the batter. Create a star pattern inside the circle, and add one final slice at the very center. Sprinkle the top with 2 tablespoons sugar and several grates of nutmeg.

Bake for 50 – 60 minutes, or until the top is a light golden brown and a toothpick inserted in the center comes out with just a few crumbs attached.

Set cake aside to cool for a few minutes, then remove from the cake pan. Allow to cool completely.

Set cake aside to cool for a few minutes, then remove the springform side and allow to cool completely.


1826 is a gift to Miami

For whatever reason Chef Danny Grant decided to open a restaurant in Miami (Lebron, le ladies etc) I am thankful. His 1826 restaurant in South Beach is a show stopper. I would usually share pics of what I ate but the flash was so obnoxious I figured I could explain with my words.

FOOD

Sensational. Each dish was a surprise of flavor and had us asking “What the hell was in that?” From the bread to the dessert, there was no detail overlooked. The burrata dish is a must and was so divine I’m going to try to recreate it – anyone got a dehydrator I can borrow? My husband had the lamb shank which was cooked to perfection and nestled in a soft lovely sauce that had subtleties of cardamom and other spices. I got the seafood stew in which the waiter poured the hot creamy broth over the mix of fish, shrimp and vidalia onions so the wafts of curry could slap me right in the face. Nicely done.

SPACE

Lovely design. Beautiful wine cellar. You can also select your beer/wine/cocktail off of a convenient and informative iPad. There is also a third floor that has a lounge but we’re saving that rendevous for a weekend evening.

STAFF

Attentive. Knowledgeable. Unpretentious. My fav.


Hopefully, this gift from Grant will be appreciated by the Miami critics and continue as a South Beach treasure.


http://www.1826collins.com/


When you’re avocados are saying “Eat me now”: Avocado Chocolate Mousse

Avocado and Chocolate are just about my two favorite things. I eat both almost everyday… but never together. Until now. A friend brought over a bag of local avocados and I’m sure many of you feel the same when I talk about the anxiety of using an avocado at exactly the right moment.

Screen Shot 2014-08-20 at 6.54.16 PM

This image captures the sentiment perfectly. My mom gave me a good tip to put them in the fridge as soon as they’re ripe and that will buy you an extra couple of days. REALLY the fridge? Who would have thought of that. Clearly not me.

Let’s get to the good stuff – I was faced with all these ripe avocados and thought to myself

“Guacamole? No, I’ll eat the whole bag of chips.”

“Avocado toast? That’s so 2013.”

“With chocolate? That’s weird, but hey, so am I.” Hence, AVOCADO CHOCOLATE MOUSSE. Silky and smooth, this dessert concept may frighten you, but I assure you that the mere purpose of the avocado is to add that soft velvety texture. Try it, you won’t be missing the guac.

Eñoy!

IMG_5293-1

AVOCADO CHOCOLATE MOUSSE

Serves 4 to 6

2 ripe avocados (I’ve used Hass and Florida and they both rocked)

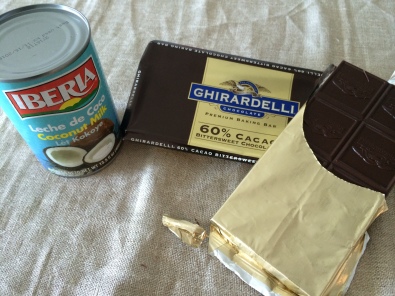
8 oz bittersweet chocolate (can also use vegan chocolate to make this a completely vegan dessert)

1/2 cup coconut milk (pour right from the can)

3/4 teaspoon vanilla extract

4 tablespoons amber (dark) agave syrup

1 teaspoon sea salt

Optional toppings could include: graham crackers, pretzels, marshmallows, berries, nuts

DIRECTIONS

1. Melt chocolate with coconut milk in a bowl over boiling water. Stir frequently.

2. In a food processor add remaining ingredients. Add chocolate mixture once it is cooled.

3. Blend until there are no avocado chunks remaining.

4. Chill and serve

IMG_5291

IMG_5298

IMG_5289

Very Merry Christmas Decor

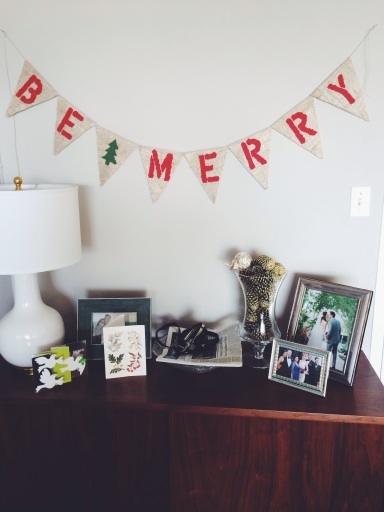
Nick and I have been in our condo for just about 3 years, and now that we’re married and have a puppy it seems only right to get our first Christmas tree and properly decorate our home. Unfortunately he was out of town for the Home Depot fiasco of scouting and transporting a tree. Not an easy task when you’re in your work wear and dragging around a little dog. Needless to say, everything came together quite nicely.

My most proud piece is my first DIY banner. I learned how to make them from this lovely blogger: Ella Claire

Processed with VSCOcam with f2 preset

Processed with VSCOcam with f2 preset

Processed with VSCOcam with f2 preset

Processed with VSCOcam with f2 preset

Processed with VSCOcam with f2 preset

Processed with VSCOcam with f2 preset

This last one here is our wedding invitation that I cut into strips and twirled. I also make these for my friends as part of their wedding gift – huge hit!

Holiday Treats Part II + Puppy Holiday Sweater

The morning after Thanksgiving can be quite a doozy. To help recover from my turkey hangover I supplied these amazing Gingery Muffins from one of my fav blogs A Cozy Kitchen.

Processed with VSCOcam with f2 preset

Recipe from A Cozy Kitchen

For muffins:
1 1/2 cups all-purpose flour
1/2 teaspoon baking soda
1 teaspoon kosher salt
1 tablespoon ground ginger
1 teaspoon ground cinnamon
1/4 teaspoon ground allspice
1/4 teaspoon ground cloves
1/2 cup buttermilk, shaken
2 teaspoons vanilla extract
8 tablespoons unsalted butter (1 stick), at room temperature
1 cup packed dark brown sugar
1/2 cup dark molasses
2 large eggs

For glaze:
1/2 cup confectioner’s sugar
1/2 tablespoon whole milk

1. Heat oven to 350°F and arrange a rack in middle. Line a muffin tin with liners.
2. In a large bowl, combine all-purpose flour, baking soda, salt, ground ginger, ground cinnamon, ground allspice and ground cloves.
3. In a measuring cup, stir together buttermilk and vanilla until combined.
4. In a another bowl, beat together the butter and brown sugar until light in color and fluffy, about 5 minutes. Beat in molasses until well combined and then add the eggs, one at a time, beating after each addition until well incorporated.
5. (Don’t be alarmed if mixture looks separated and curdled.) Scrape bowl and add one third flour mixture, beating on low speed just until flour is incorporated. Add half buttermilk mixture and once batter is smooth add another third flour mixture. Add remaining buttermilk and mix until incorporated. Add remaining flour mixture, and beat until incorporated and smooth.
6. Scoop batter into prepared muffin tin about 3/4 of the way. Bake for about 20 minutes, or until a toothpick inserted in the middle comes out clean. Cool muffins in tin for about 5 minutes before removing and transferring to a cooling rack.
7. While muffins are cooling, mix together powdered sugar with milk and stir until smooth. When muffins are completely cooled, pour icing on top of muffins and top with candied ginger. Serve right away. If you’re baking these things up and taking them somewhere, I’d recommend icing ‘em right before serving.

Processed with VSCOcam with f2 presetAlso can’t beat a hot cup of apple cider. It’ll make your lips smack!

Processed with VSCOcam with m5 preset

Pepper was also looking very festive in her Christmas sweater by Freshlotus.

HAPPY HOLIDAYS!

Holiday Treats Part I

Thanksgiving was hosted by my aunt and uncle this year but there was no way I was going to show up empty handed. So in addition to the customary bottle(s) of wine, we brought spiced nuts and biscuits, of course.

Processed with VSCOcam with c1 preset

Rosemary Chili Spiced Almonds

1 1/2 C of raw almonds
2 tsp rosemary
1 tsp salt
3 tbsp agave nectar
2 tsps chili or cayenne or combo

Preheat oven to 350.

Line baking sheet with parchment paper and non-stick spray. Do not forget the spray or else you will have wax paper stuck to your nuts. No bueno.

Mix ingredients all together in a bowl then evenly distribute onto baking sheet. Roast for about 20 minutes or until you can smell the almonds.

Processed with VSCOcam with c1 preset

Honey Chai Roasted Almonds

Recipe from Joy the Baker

3 cups raw almonds

1 1/2 teaspoons ground cinnamon

1 1/2 teaspoons freshly grated nutmeg

1 teaspoon ground cardamom

1 teaspoon ground ginger

1/2 teaspoon salt

1/2 to 1 teaspoon fresh cracked black pepper (depending on how spicy you like your nuts)

3 tablespoons honey

coarse sea salt for topping

Place a rack in the upper third of the oven and preheat oven to 400 degrees F.

Line a rimmed baking sheet with parchment paper.  Grease the parchment paper with olive oil or cooking spray.

Place almonds on baking sheet and toast for 10 minutes.

While the almonds are in the oven, in a small bowl, toss together cinnamon, nutmeg, cardamom, ginger, salt, and pepper.

Remove the toasted almonds from the oven.  Drizzle with honey and toss to coat.

Sprinkle with the spice mixture and toss well to ensure that all of the almonds have a bit of spice. Sprinkle generously with coarse sea salt.  And heck.. drizzle with a bit more honey if you’d like.

Return to the oven and toast for 8 minutes.  Remove from the oven and immediately trasnsfer the warm nuts to a plate to cool or jars for storage.  The nuts will begin to harden as they cool and become difficult to remove.

Store almonds in an airtight container for up to two weeks.

Processed with VSCOcam with c1 preset

Rosemary Parmesan Drop Biscuits

Drop biscuits are an easy way to make biscuits without the hassle of rolling out dough and cutting out the biscuits.

2cups unbleached all-purpose flour (10 ounces)
2teaspoons baking powder
1/2teaspoon baking soda
1teaspoon sugar
3/4teaspoon table salt
3/4cup grated Parmesan cheese (1 1/2 ounces)
1/2teaspoon chopped fresh rosemary
1cup buttermilk (cold)
8tablespoons unsalted butter, melted and cooled slightly (about 5 minutes), plus 2 tablespoons melted butter for brushing biscuits

1. Adjust oven rack to middle position and heat oven to 475 degrees. Whisk flour, baking powder, baking soda, sugar, salt, Parmesan, and rosemary in large bowl. Combine buttermilk and 8 tablespoons melted butter in medium bowl, stirring until butter forms small clumps (see photo below).

2. Add buttermilk mixture to dry ingredients and stir with rubber spatula until just incorporated and batter pulls away from sides of bowl. Using greased 1/4-cup dry measure, scoop level amount of batter and drop onto parchment-lined rimmed baking sheet (biscuits should measure about 2 1/4 inches in diameter and 1 1/4 inches high). Repeat with remaining batter, spacing biscuits about 1 1/2 inches apart. Bake until tops are golden brown and crisp, 12 to 14 minutes.

3. Brush biscuit tops with remaining 2 tablespoons melted butter. Transfer to wire rack and let cool 5 minutes before serving.

Black + White Fundraiser

Recently we attended a fundraiser for the Team Nat Foundation to raise funds for cancer research. It was a great party for an even greater cause. Here’s what I wore: Top / Skirt / Shoes Zara

IMG_1544

6464201040_1_1_1

Having fun with the photographer while my hubs didn’t know what was going on.

IMG_1549


Photography by Lizzie Renfrow http://www.ra-haus.com

Halloween Costume + CAKE!

For Halloween I made a chocolate bundt cake with my new bundt pan. I chose the recipe because of the way it looked so I wasn’t expecting much in terms of taste, but DAMN was I wrong. This cake was moist and rich and went great with ice cream or a glass of milk. This one is going into my book of keepers.
Processed with VSCOcam with g3 preset

***Updated with recipe:

  • 2 cups sugar
  • 1 3/4 cup all-purpose flour
  • 3/4 cups dutch process cocoa powder, plus more for dusting
  • 1/2 teaspoon salt
  • 1 teaspoon baking powder
  • 2 teaspoons baking soda
  • 1 cup sour milk
  • 1 cup freshly brewed strong black coffee
  • 1/2 cup vegetable oil
  • 2 eggs
  • 1 teaspoon vanilla
Directions

Preheat oven to 350. Butter a bundt pan and dust the inside with cocoa powder, set aside.
Sift together sugar, flour, cocoa powder, salt, baking powder and baking soda in a bowl. Set aside.
In a mixer on low add the milk, coffee, vegetable oil, eggs and vanilla one at a time. mix until everything is incorporated. Then, with the mixer still on low speed, slowly add in the dry ingredients. Once all of the flour mixture is added, mix the batter for a full four minutes on medium speed.
Then, pour the batter into the bundt pan and bake for 45 minutes, or until a cake tester comes out clean. Allow to cool to room temperature on a wire rack. Then, dust with powdered sugar and serve.

My hubs dressed up as Guy Fieri and I went as Clockwork Orange. DINERS DRIVE-INS AND DIVES! was the only thing he said all night.
Processed with VSCOcam with f2 preset

This was a fun project that my neighbors seemed to enjoy.Processed with VSCOcam with f2 preset